Spots
Create and edit places or objects
The most significant difference between xamoom and other content management systems (CMS): content can relate to places or objects and offer specific pages to those. We call them “spots”.
The Spotlist
Clicking on “Spots” in the menu will list all the places and objects that are available in the system together with their assigned pages.
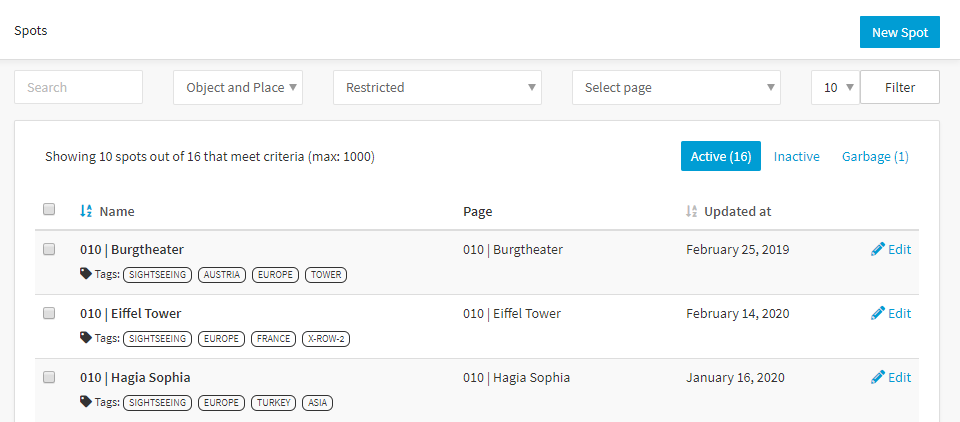
Search and filter: The full-text search also recognizes parts of the spot’s name. You only need to type “tra” when you want to search for “train station”. Additionally, you can search for tags to group certain pages.
Active, Inactive, and Garbage: You can mark spots as inactive – e.g., if someone removed a smart label or beacon at a location or an exhibition, came to an end. This way, only relevant – because active – spots are visible to you and your users.
Deleted spots are not completely gone after removing them – they are moved to the garbage. Only once you press the “Delete” button on the garbage list a spot is completely gone.
Clicking on a row in the list of spots will let you edit the corresponding spot. Below the name, you will find a list of all tags associated with the spot. If you click on one of the tags you will get a list of all spots that have the same tag.
Start creating your first spot now using the New Spot button in the upper right corner.
Batch actions
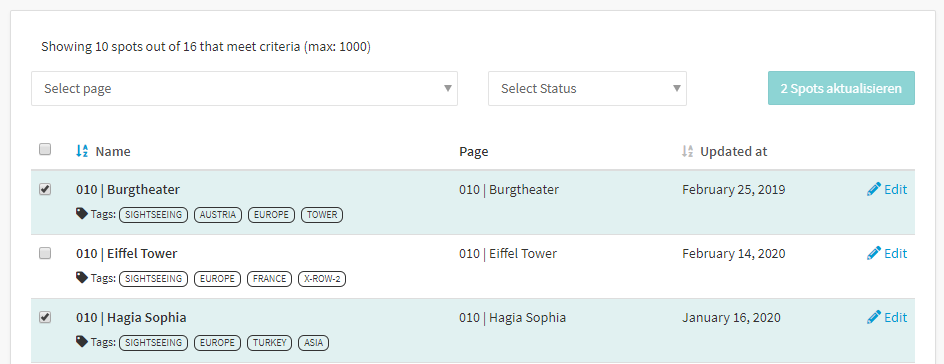
You can edit many spots simultaneously by selecting them using the checkboxes on the left side. You can batch-assign pages to the spots picked or change their state.
Activating and deactivating iBeacons
If you want a beacon to be inactive in apps, you have two possibilities:
- deactivate the spot (this would affect the spot's visibility on maps; smart labels also cease to work)
- separate the page from the spot (thus, the user cannot open the page via the map)
Consequently, there will be no notifications, and the nearby section of an app will stay empty.
Creating and editing spots
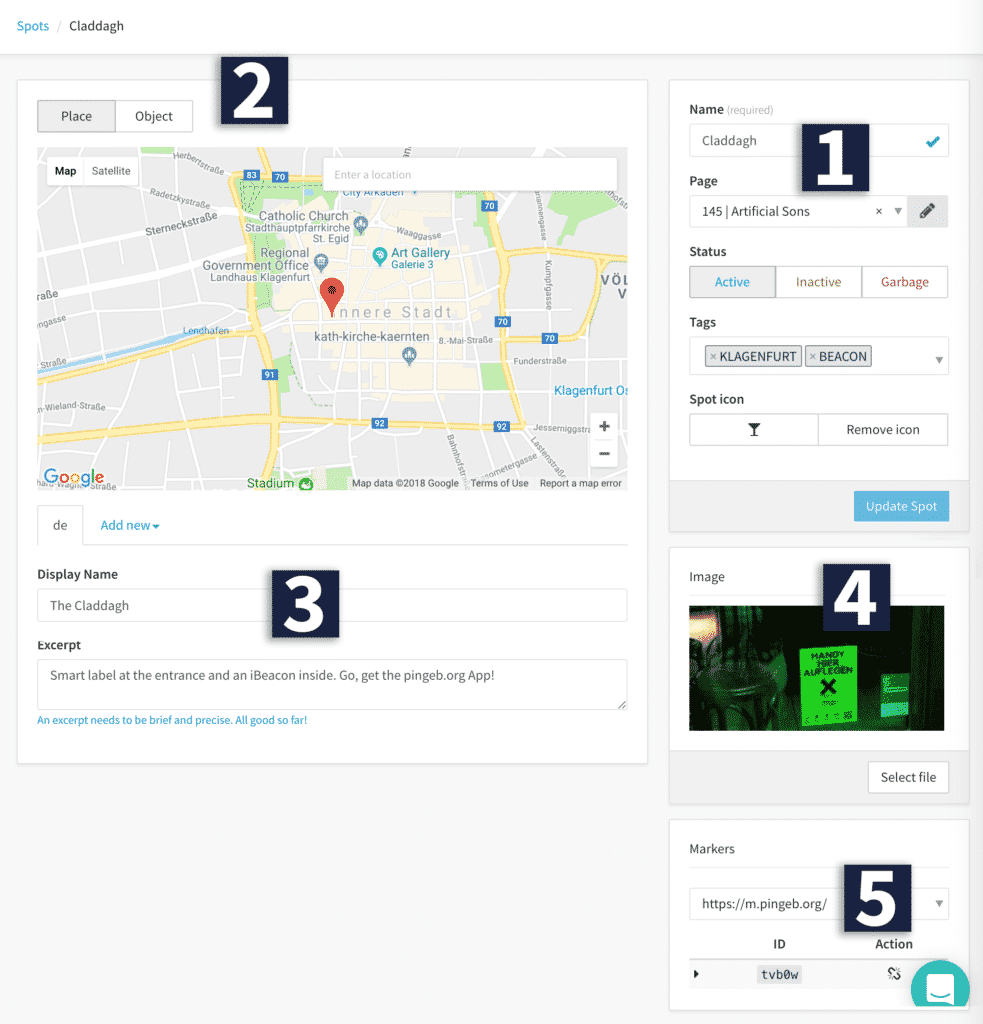
- Name of the spot
This must not be confused with the Display Name that is localized into various languages. The name has two main purposes: finding it again with the search on the spot list and organizing it. - Place or object:
Choosing between places or objects determines if a spot can show up on maps. If you create an object, the map disappears. Every place has a position on a map that you can choose with the mouse or by entering a location name or address into the map’s search field. This position also serves as a geofence with a default radius of 40 meters. - Display name and excerpt:
Visible on maps, this information is localized to the languages you offer. The geo-position is also used to provide a navigation link (arrow icon) for the user. - Image:
Every spot can have an image that helps the user to easier identify the location. - Markers:
If you save your spot, a marker is assigned to it automatically. Clicking on expands the panel and shows all identifiers of the marker set (QR, NFC, iBeacon).
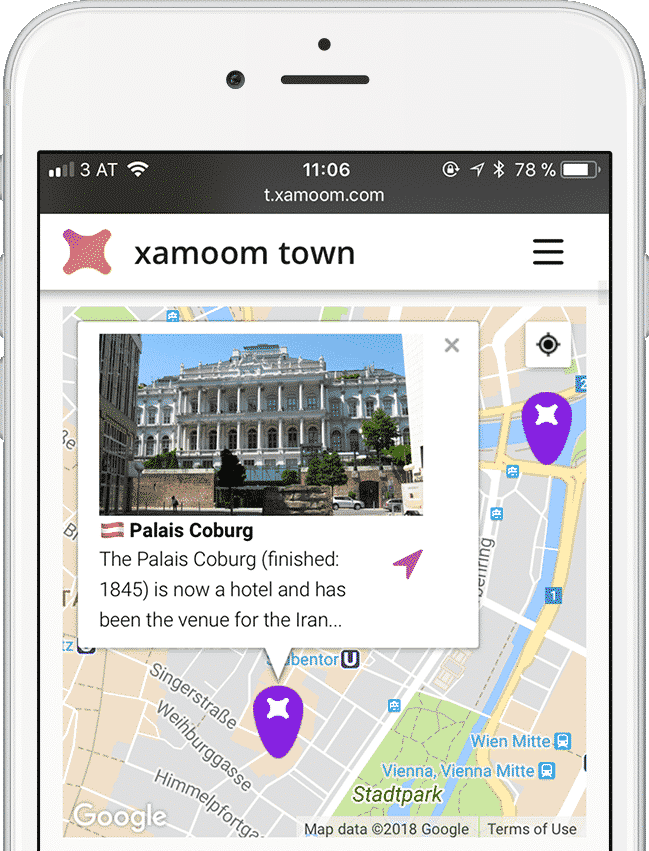
Note: To show spots in the main map of xamoom's smart apps, you need to give them the tag “map”.
